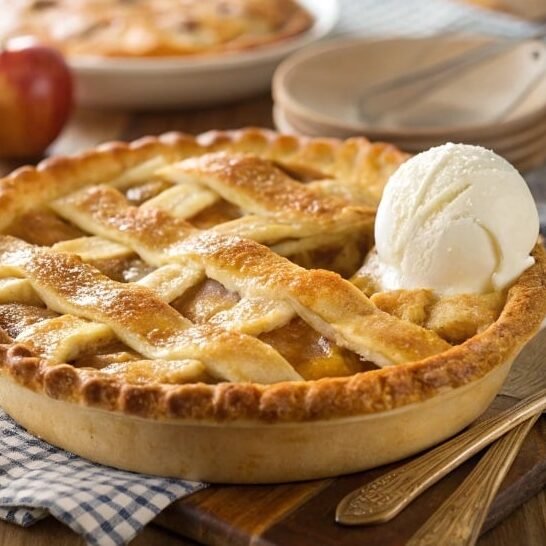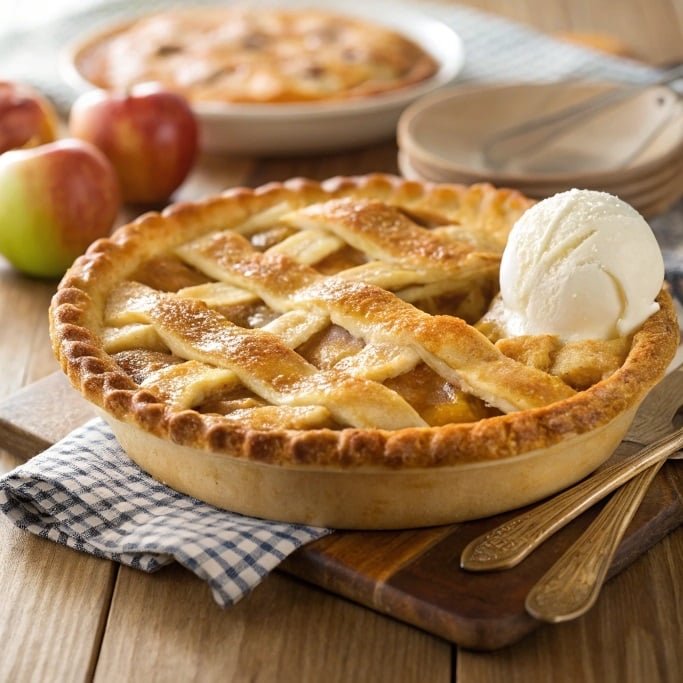
Apple Pie with Store Bought Crust
There is nothing more comforting than the aroma of a warm apple pie baking in the oven. For generations, the pie has been a symbol of family, tradition, and togetherness. Some bakers cherish the art of making pastry by hand, but not everyone has the time or patience for that process. Thankfully, using a store bought crust can make the experience faster while still delivering a dessert that tastes homemade. In fact, with the right technique, you can create the Best Ever Apple Pie even if you start with a frozen pie crust or refrigerated dough. This guide will walk you through everything you need to know about preparing a pie that tastes like it came from your grandmother’s kitchen.
The beauty of this recipe lies in the fact that you can focus more on the filling and the flavors of the apples rather than stressing about rolling out dough. A double pie crust or buttery pie crust from the store can serve as a reliable base. Whether you are preparing dessert for a holiday table, a weekend dinner, or just because you love baking, a classic apple pie made this way is guaranteed to win hearts. Let us begin by looking at why using a store bought crust is not only convenient but also practical for modern kitchens.
Why Choose a Store Bought Crust
There are several reasons to rely on ready-made crusts. First, consistency. A professionally prepared crust offers uniform thickness and texture. Second, convenience. With a frozen pie crust, you simply thaw and bake, saving time when you are juggling many other dishes. Third, versatility. Many brands now offer buttery pie crusts that taste very close to homemade. For anyone who has struggled with pastry dough that crumbles or shrinks, this option is liberating. Finally, store bought crusts are available in both refrigerated roll-out versions and ready-to-use pie tins, making them adaptable for every baker.
Choosing the Best Crust
When selecting a crust, look for labels that highlight a buttery flavor. The fat content in a buttery pie crust creates that flaky texture everyone loves. If you prefer a double pie crust with a top layer, choose refrigerated dough that you can roll out and use to cover your pie. For a simpler route, a frozen pie crust in an aluminum tin works well for single-crust pies. Either option allows you to create a pie that balances the sweet and tart notes of the filling with a crisp and golden shell.
Ingredients for Apple Pie with Store Bought Crust
- 2 store bought pie crusts (frozen pie crust or refrigerated buttery pie crust)
- 6 to 7 medium apples (Granny Smith, Honeycrisp, or a mix for balance)
- 3/4 cup granulated sugar
- 1/4 cup brown sugar
- 2 tablespoons all-purpose flour
- 1 teaspoon cinnamon
- 1/4 teaspoon nutmeg
- 1/4 teaspoon salt
- 1 teaspoon vanilla extract
- 1 tablespoon lemon juice
- 2 tablespoons unsalted butter, cut into small cubes
- 1 egg, beaten with 1 tablespoon water (for egg wash)
These ingredients combine to give you the classic sweet, spiced flavor that makes apple pie unforgettable. The flour thickens the juices, the cinnamon and nutmeg provide warmth, and the lemon juice brightens the flavor. With the crust already prepared, most of your effort will be focused on slicing apples and mixing the filling.
Step-by-Step Instructions
Step 1: Prepare the Apples
Peel, core, and slice the apples into thin wedges. Place them in a large bowl and toss with lemon juice to prevent browning. Add the granulated sugar, brown sugar, flour, cinnamon, nutmeg, salt, and vanilla extract. Stir until every slice is evenly coated. This mixture should rest for about 15 minutes to allow the apples to release some of their juices.
Step 2: Ready the Crust
If using a frozen pie crust, let it thaw according to the package directions. If using refrigerated dough, roll one crust into a 9-inch pie plate. Smooth the dough into the corners without stretching. The goal is to ensure the crust holds its shape while baking.
Step 3: Fill the Pie
Spoon the apple mixture into the prepared crust, mounding the apples slightly in the center. Dot the filling with small cubes of butter. The butter adds richness and helps the filling develop a silky texture as it bakes.
Step 4: Add the Top Crust
If you are making a double pie crust, roll the second piece of dough over the apples. Trim excess dough and crimp the edges to seal. Cut small slits in the top to allow steam to escape. For a lattice design, cut strips of dough and weave them across the top. If using only one frozen pie crust, you can skip the top and bake as an open-faced pie. Brush the top crust with egg wash for a golden finish.
Step 5: Bake
Preheat your oven to 425°F (220°C). Place the pie on a baking sheet to catch any drips. Bake for 20 minutes, then reduce the temperature to 375°F (190°C) and continue baking for 35 to 40 minutes, or until the crust is golden and the filling is bubbling. If the edges brown too quickly, cover them with foil strips.
Step 6: Cool and Serve
Once baked, allow the pie to cool for at least 2 hours. This cooling period helps the filling set, making slicing easier. Serve warm or at room temperature, ideally with a scoop of vanilla ice cream.
Tips for Success
- Choose a mix of apple varieties for depth of flavor. Granny Smith provides tartness, while Honeycrisp or Fuji adds sweetness.
- Always preheat your oven to ensure the crust cooks evenly.
- Brushing the top with egg wash creates a glossy finish that makes the pie look bakery-quality.
- Use a glass pie dish if possible. It allows you to see when the bottom crust is fully baked.
Variations
An old fashioned apple pie typically uses a simple mix of apples, sugar, and spices, while modern versions may include caramel drizzle, streusel topping, or even cheddar cheese baked into the crust. If you want to try something unique, swap cinnamon for cardamom or add a splash of bourbon to the filling. For a lighter version, reduce the sugar and let the natural sweetness of the apples shine.
Storing Your Pie
A freshly baked pie can sit at room temperature for two days. To keep it longer, store it in the refrigerator for up to five days. You can also freeze baked pies. Wrap tightly in foil and plastic wrap, then store in the freezer for up to three months. Thaw overnight in the fridge before reheating in the oven.
Serving Ideas
Apple pie pairs beautifully with vanilla ice cream, whipped cream, or even a slice of sharp cheddar for contrast. For an autumn gathering, serve alongside hot apple cider. For summer, pair it with iced tea and fresh berries. The versatility of this dessert makes it a year-round favorite.
Conclusion
Making apple pie with store bought crust proves that you do not need hours in the kitchen to create something special. With a frozen pie crust or a buttery refrigerated crust, you can put your energy into the filling and enjoy the process. The end result is a pie that tastes homemade, looks beautiful, and brings people together. From old fashioned apple pie recipes to more creative twists, the humble apple pie remains at the heart of American desserts. Whether you prefer a classic apple pie with a double pie crust or a rustic single crust with golden edges, the joy of biting into a slice of warm, spiced apples tucked into a good pie will never go out of style.

Apple Pie with Store Bought Crust
Ingredients
Equipment
Method
- Peel, core, and slice apples. Toss with lemon juice, sugars, flour, cinnamon, nutmeg, salt, and vanilla. Let rest for 15 minutes.
- Prepare the crust: If using frozen, thaw as directed. If using refrigerated, roll into a 9-inch pie plate.
- Spoon apple mixture into prepared crust, mounding slightly in the center. Dot with butter cubes.
- For a double crust: Place second crust over filling. Trim and crimp edges, cut slits for steam. For lattice, weave strips over apples. Brush with egg wash.
- Bake at 425°F (220°C) for 20 minutes. Reduce oven to 375°F (190°C) and bake 35–40 minutes until golden and bubbling. Cover edges with foil if browning too quickly.
- Cool for at least 2 hours before slicing. Serve warm or at room temperature with vanilla ice cream.